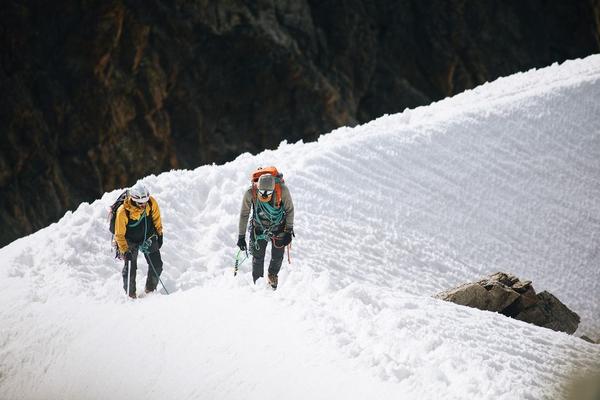
Winter hiking can turn a familiar trail into a completely different trip. Snow hides rocks and trail edges, ice changes how every step feels, daylight disappears earlier, and a mild forecast at the trailhead can become wind, blowing snow, or sharply colder temperatures higher up. Good winter hiking safety starts with treating the season as a change in conditions, not simply a colder version of a summer walk.
The safest approach is conservative: choose a route that fits your experience, check current conditions, carry more than you expect to need, and be willing to turn around early. That mindset matters just as much as boots, layers, or traction.
Plan for Winter Conditions Before You Leave
Start with the weather forecast, but do not stop there. Check recent trail reports, park or land-manager alerts, road access, expected snowfall, wind, and any relevant avalanche information. Conditions at higher elevations can differ substantially from those at the parking area.
Tell someone where you are going, which route you expect to follow, when you plan to return, and what they should do if you are overdue. Save the route offline and carry a paper map and compass or another navigation backup you know how to use. Cell coverage can be unreliable, and cold temperatures can reduce battery performance.
Pick a turnaround time before you start and keep it even if the summit or viewpoint feels close. A route that normally takes three hours can take much longer when you are breaking trail or moving carefully over ice. Carry a headlamp with spare power even when you expect to finish in daylight.
Dress to Stay Warm Without Getting Soaked
Effective cold weather hiking clothing is built in layers. A moisture-managing base layer helps move sweat away from your skin, an insulating layer holds warmth, and a wind- and water-resistant outer layer protects against snow and changing weather. Pack an extra insulating layer for stops, when your body can cool quickly.
Cover hands, head, ears, and exposed facial skin when conditions demand it. Waterproof boots and gaiters can help keep snow and slush away from socks and lower legs. Carry spare dry socks and gloves. Staying dry is a major part of hypothermia prevention because wet clothing can accelerate heat loss.
Adjust layers before you become sweaty. If you feel hot early in a climb, remove a layer or open ventilation rather than waiting until your clothing is damp. Put insulation back on as soon as you stop.
Match Your Footwear and Traction to the Surface
Snow hiking safety depends heavily on what is underfoot. Packed snow and ice may call for over-the-shoe traction devices, while deeper soft snow can make snowshoes more appropriate. Trekking poles can add balance on uneven or icy ground. No traction device makes every slope safe, so judgment still comes first.
A common mistake is waiting until a slip happens before putting traction on. Imagine a trail that is dry in the sun but turns onto a shaded, north-facing section where hard ice covers the next switchbacks. Stop on stable ground, add traction there, and reassess before stepping onto the ice. If the surface or exposure exceeds your skill or equipment, turn around.
Avoid walking onto frozen lakes, ponds, or streams unless the area is specifically managed and officially declared safe for that use. Ice strength can vary over short distances.
Navigate as If the Trail Could Disappear
Snow can bury trail markings, rocks, junctions, and the path itself. Tracks from earlier hikers are not reliable navigation; they may lead off route or have been made under different conditions. Keep checking your position against your planned route rather than waiting until something looks wrong.
Natural internal linking opportunities for this topic include winter hiking gear checklist, how to read a trail map, and adventure travel emergency kit.
Watch Weather, Wind, and Avalanche Exposure
Falling temperatures, strengthening wind, fresh snow, poor visibility, or rapidly covering tracks should trigger a fresh decision about whether continuing still makes sense. Turning around early preserves daylight, energy, and options.
If your route enters avalanche terrain, ordinary hiking experience is not enough. Check the current avalanche forecast where one is available and avoid terrain you are not trained and equipped to evaluate. Snowpack stability can change, while steep slopes and runout zones can create serious exposure. Choose lower-risk terrain when conditions or your knowledge are uncertain.
Carry Enough Food, Water, and Emergency Gear
Cold does not eliminate the need for hydration. Drink regularly and carry water in a way that reduces the chance of freezing. Bring calorie-dense food that is easy to eat without a long stop. Useful emergency gear may include a first-aid kit, headlamp, navigation tools, emergency shelter, whistle, repair items, and extra warm clothing.
For longer or remote outings, ask what would happen if an injury forced you to stop moving for an hour. The answer should influence how much insulation and emergency protection you carry.
Recognize Cold-Related Warning Signs Early
Hypothermia can occur when the body loses heat faster than it can replace it, including in cool conditions when a person is wet from rain, sweat, or cold water. Warning signs can include persistent shivering, unusual exhaustion, confusion, fumbling hands, slurred speech, memory problems, and drowsiness. Treat these signs seriously, get the person out of the cold and wet, add dry insulation, and seek emergency medical help.
Frostbite commonly affects fingers, toes, ears, nose, cheeks, and chin. Numbness, unusually firm or waxy skin, or pale or discolored skin can be warning signs. Protect exposed skin early and seek medical care for suspected frostbite rather than trying to push through the hike.
FAQ
What is the most important winter hiking safety tip?
Plan conservatively and be willing to turn around. Current weather, trail conditions, daylight, surface traction, and your own energy level should determine whether you continue, not the desire to reach a destination.
Do I need traction devices for winter hiking?
If a trail is likely to have packed snow or ice, carrying suitable traction is a sensible precaution. Deeper soft snow may require snowshoes instead. Choose equipment for the actual surface and terrain rather than the season alone.
Can hypothermia happen above freezing?
Yes. A person can become hypothermic in cool conditions above freezing when rain, sweat, or cold water leaves them chilled for long enough. Staying dry, layering properly, and responding early to symptoms are key precautions.
How much earlier should I turn around in winter?
There is no single time that fits every hike. Set a turnaround time using sunset, route difficulty, trail conditions, your pace, and a generous safety margin. Do not extend it simply because the destination appears close.
Make Conservative Decisions Before Conditions Make Them for You
The best winter trail tips are less about toughness than about margin. Give yourself extra daylight, extra insulation, backup navigation, the right traction, and permission to abandon the plan when conditions change. Winter hiking can be quiet, beautiful, and rewarding, but it deserves more preparation and more cautious decision-making than the same route may require in warmer months.